This malware has been found on malwr.com I later downloaded this sample from a third-party website.
The following is a quick analysis of this malware, later identified as “Necurs.A”.
- MD5: 124819875fdb33ffa4b651ffbc6ce3d8
- SHA1: 3604fa830085135d751c3e5c955b69e7ee57a59e
- Driver detection: https://www.virustotal.com/file/639542f483886c6eb40674dc23210e8ebdfe5eebf86496a2a003fd2d807e9d65/analysis/1344159716/
- VT Detection ratio: 7 / 41 (05/08/2012)
Analysis
Tools used:
- Windbg
- IDA Pro Free
- Immunity Debugger
- DeviceTree
Dropper
By looking at the import table, noticing the lack of strings and the size of the DATA section, we can already assume the malware is packed.
Stage 1 :
The malware unpacks a binary, executes it then terminates.
Stage 2 :
The newly created process downloads a executable from a C&C. The dropped file is copied in the current user’s “Application Data” folder. The copied file (“WinUltraAV.exe”) is executed and the parent process is terminated. The file downloaded is different whether you’re running or 32 or 64 bits OS.
Stage 3 : WinUltraAV
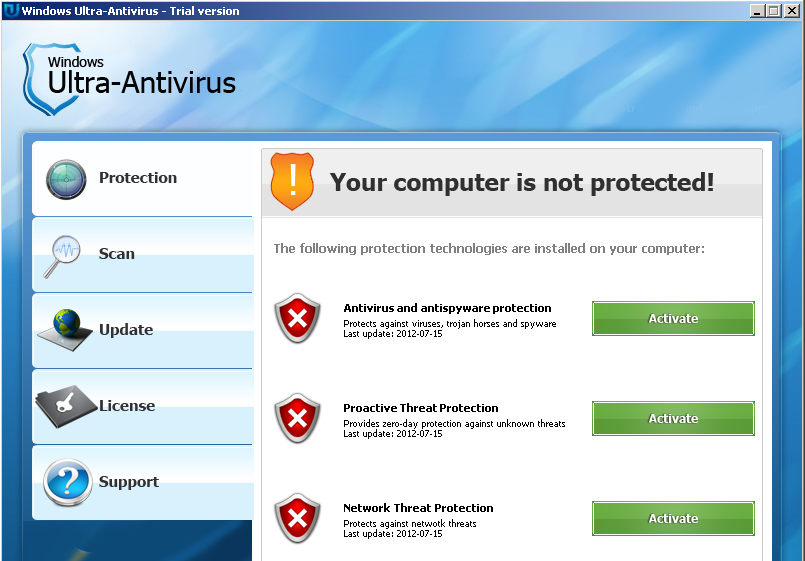
“WinUltraAV.exe” is a Fake-AV edited by the so-called “Zokaisoft” company.
“WinUltraAV.exe” :
-
is packed
-
is protected
-
sets persistance through HKEY_CURRENT_USER\Software\Microsoft\Windows\CurrentVersion\Run –> mimhijyrkyrq
-
fetchs information from zokaisoft.com
-
installs a driver
-
creates a service with a random name (in this case ‘12d3deb’)
This fake AV is presented as a trial version. To unlock it you need to spend 49.95$ for a 6 months subscription (payement is made through a system called “AirPay”). If you inject in the form’s fields, characters which may trigger an SQL injection, server will return a 404 error.
A randomly named driver is installed.
The malware contains a BMP file resource (1.25 MB, almost close to 100% of the malware size).
Hex dump of the resource, presented as a BMP file.
Back in the debugger we can see the content of the “BMP file” stored in memory:
Then a ‘decryption’ routine is executed (XOR):
After the first iteration of the loop we discover that the encrypted file is a PE:
UPX packed PE:
Once the data XORed, VirtualAlloc, VirtualProtect and VirtualFree are imported.
Naturally the memory region where new code is stored is marked as executable then the code is called.
Once the UPX unpacking routine executed, the new code will drop a driver (C:\Windows\system32\drivers\430c5e.sys), then create and start a new service.
Once the service started, the malware will attempt to contact a list of C&C servers and attempt to download a file.
The malware starts svchost.exe as suspended (CREATE_SUSPENDED) then rewrite all of its memory with malicious code. Once the code written, execution is resumed and the modified process will now run malicious code. The main advantage of this technique is that the process PEB remains the same and thus will remain ‘valid’. For example if you decide to fire up_Proces Explorer_ and use its ‘Verify’ feature on the modified svchost.exe process, it will return no error. You can find a code example here
The malicious svchost.exe creates multiple threads whose purpose are to slow down the machine. The malicious executable embeds a PNG image as a resource. It converts it into BMP couple times to consume CPU time.

Driver analysis:
The driver drops a second driver (detected as Necurs.A). Once this driver loaded, the “dropper” unloads itself.
The analysis will be based on this second driver. Note that both a 32 and a 64 bits version of the driver exists.
Here are the main characteristics of this second driver:
- installs a callback on registry functions to protect its registry key
- installs a callback to be notified whenever an image is loaded (or mapped) into memory
- installs a filesystem filter
- hooks NtOpenProcess and NtOpenThread
Filesystem Filter
The driver creates a device which will later be attached to \Filesystem\sr.
The following disassembly shows the device creation routine:
The driver object is passed to IoCreateDevice:
A dump of the DRIVER_OBJECT structure:
Since the device hasn’t been created yet, you can see that the DeviceObject member is still set to null.
Once returned from IoCreateDevice, we can dump the DRIVER_OBJECT structure once more and see that the DEVICE_OBJECT has been populated:
Once the device properly created, the driver will set up a symbolic link between the device object and a user friendly name, using the IoCreateSymbolicLink function (note: the address and the driver name shown in the following screenshot are different since it has been done on a different machine):

We can now dump the DEVICE_OBJECT structure and see that the newly created object is attached to \Filesystem\sr\ :
Let’s try to see if we can get the device name… First, let’s dump the DEVICE_OBJECT structure:
Here is a description of the NextDevice member (from MSDN) : “A pointer to the next device object, if any, that was created by the same driver”
We now know that the created device is called NtSecureSys.
This is confirmed by DeviceTree(note : it would have been impossible to load DeviceTree’s driver since the rookit doesn’t allow certain drivers to be loaded). This part will be detailed later once the analysis finished.
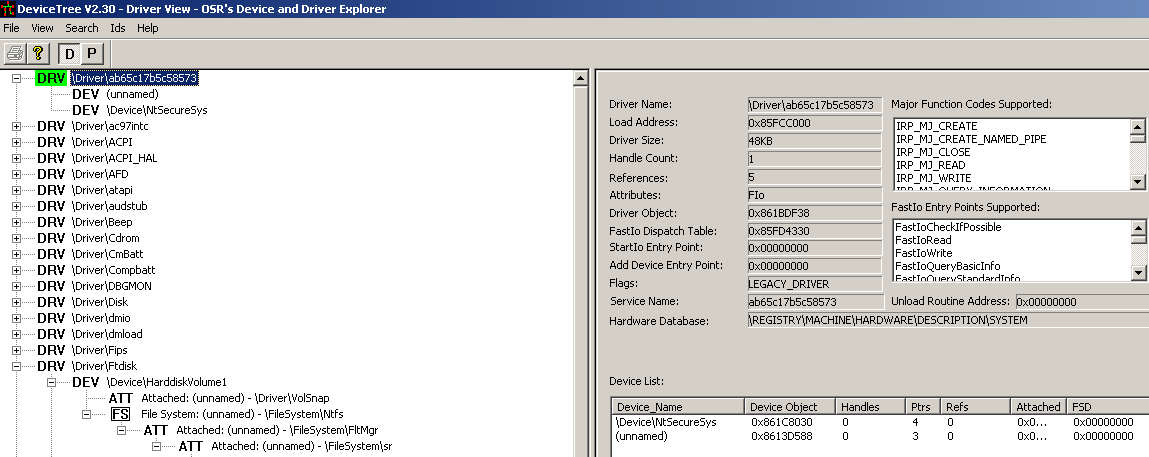
To fully understand what is the impact of filesystem filter here is a short description:
“The Windows Driver Model (WDM) uses a layered model for devices. The devices are layered over one another to form a device stack. The driver that owns a device is responsible for handling events generated for that particular device. On receiving a request for a particular device, the input/output (I/O) manager creates an interrupt request packet (IRP) and sends it down the device stack.
Each driver that owns a device on the device stack is given a chance to handle this request. A driver can choose to simply return, request to be notified on completion of the request, service the request by itself, or pass the IRP request to the driver below it. ” (Crimeware – Understanding new attacks and defenses).
In this case, the driver is able to manipulate requests and modify answers.
To prevent the device from attaching itself to the filesystem stack, put a breakpoint on IopAttachDeviceToDeviceStackSafe function during system boot and bypass the function when the sent DEVICE_OBJECT structure will be the rootkit one.
Callbacks
Using Analyze-v.com’s windbg extensions, it was easy to detect that the driver registered two callback functions on:
-
the registry (to monitor/block or modify a registry operation).
-
the image loading routine (to be notified when an image is mapped or loaded in memory)
Registry callback routine address as shown in Windbg:

LoadImageNotifyRoutine address as shown in Windbg:
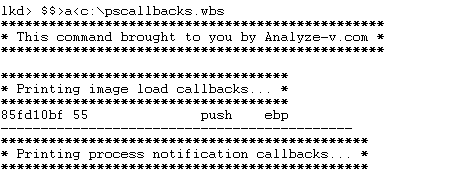
Let’s put a breakpoint on the “Image Load” callback routine.
Here is the callback routine prototype:

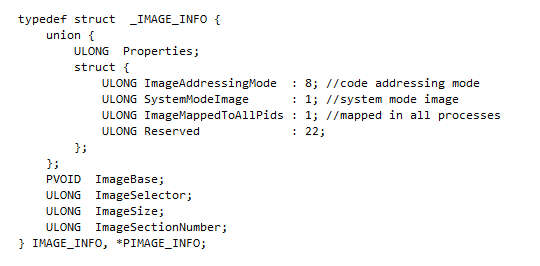
Where IMAGE_INFO structure is defined as followed:
When the breakpoint is triggered, after a couple of steps, here is what you can see:

The address on the left (inside the red rectangle) is the address of the IMAGE_INFO_ structure.
SystemModeImage member is set either to ‘1’ for newly loaded kernel-mode components, such as drivers, or to ‘0’ for images that are mapped into user space. Setting the bit to ‘0’ will allow a driver to be loaded. Another solution would be to rewrite the ‘EIP’ in order to bypass the rest of the function.
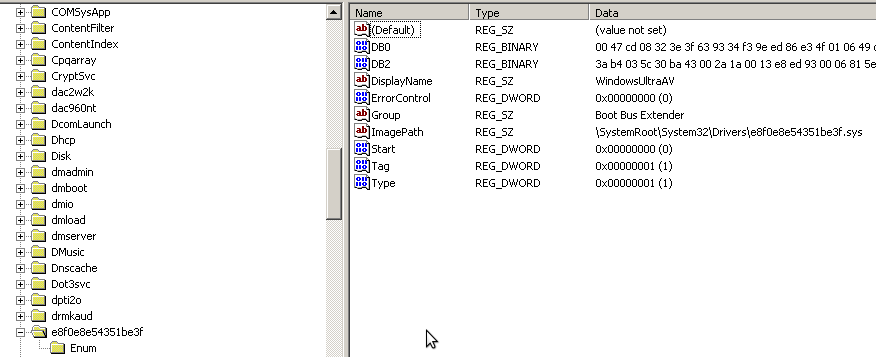
As previously mentioned, the rootkit, protects its service configuration using a registry callback routine.
In the screenshot below you can see the protected key name:
The driver calls PsGetProcessImageFileName to determine which process is accessing the registry. The only process having access to the protected key is “services.exe”.
I’m not going to detail the function’s specifications, since its only goal is to protect the driver’s service registry key.
Once the callback registration routine has been bypassed, here is what we can see:
SSDT Hooks
The driver installs two SSDT hooks:
-
NtOpenProcess
-
NtOpenThread
“The !chkimg extension detects corruption in the images of executable files by comparing them to the copy on a symbol store or other file repository”.

As you can see in the screenshot above, !chkimg detected that the nt module has been corrupted.
The following figure show a part of the SSDT (System Service Dispatch Table).

As you can see, two entries are pointing to the malicious driver (Note: the driver name in the screenshot is different since it has been done on a different machine).
NtOpenProcess and NtOpenThread are hooked to be able to properly protect “WinUltraAV” process by preventing anyone from getting a handle on the “WinUltraAV”. If you cannot get a handle on a process, you cannot interact with it, thus terminating or dumping its memory is impossible.
To restore the SSDT, simply execute “!chkimg nt -f”.
Conclusion
This malware is not highly technical. It’s designed to run on both x32 and x64 OSes. It can however be annoying to remove it if you do not have a a kernel debugger or the appropriate tools.
This analysis is not finished yet but will be further be updated.
Misc
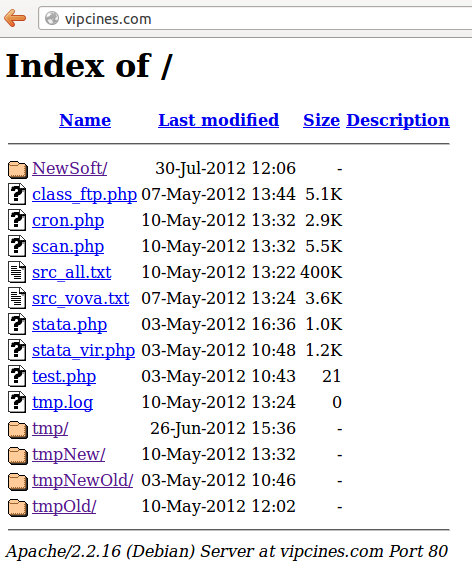
C&C server
Looks like something went wrong for this C&C server:
